Error Tracking
Sentry - error tracking solution that helps devs monitor and fix crashes in Hub.
Sentry for different Hub versions
All the information on this guide refers to the React apps. To add Sentry to a Hub v1 apps, refer to the login with Hub v1 guide
Installation#
Verify setup by installing the Sentry SDK as a dependency using npm
License and Permissions#
Request credentials to create
SentryProject and get DSN to complete configuration
To get credentials contact ITSupport helpdesk@iqmetrix.freshservice.com
Dev should have access to Sentry dashboard and have permissions to create a Project.
Sentry Project#
After dev is invited to Sentry, go to Projects > Create Project
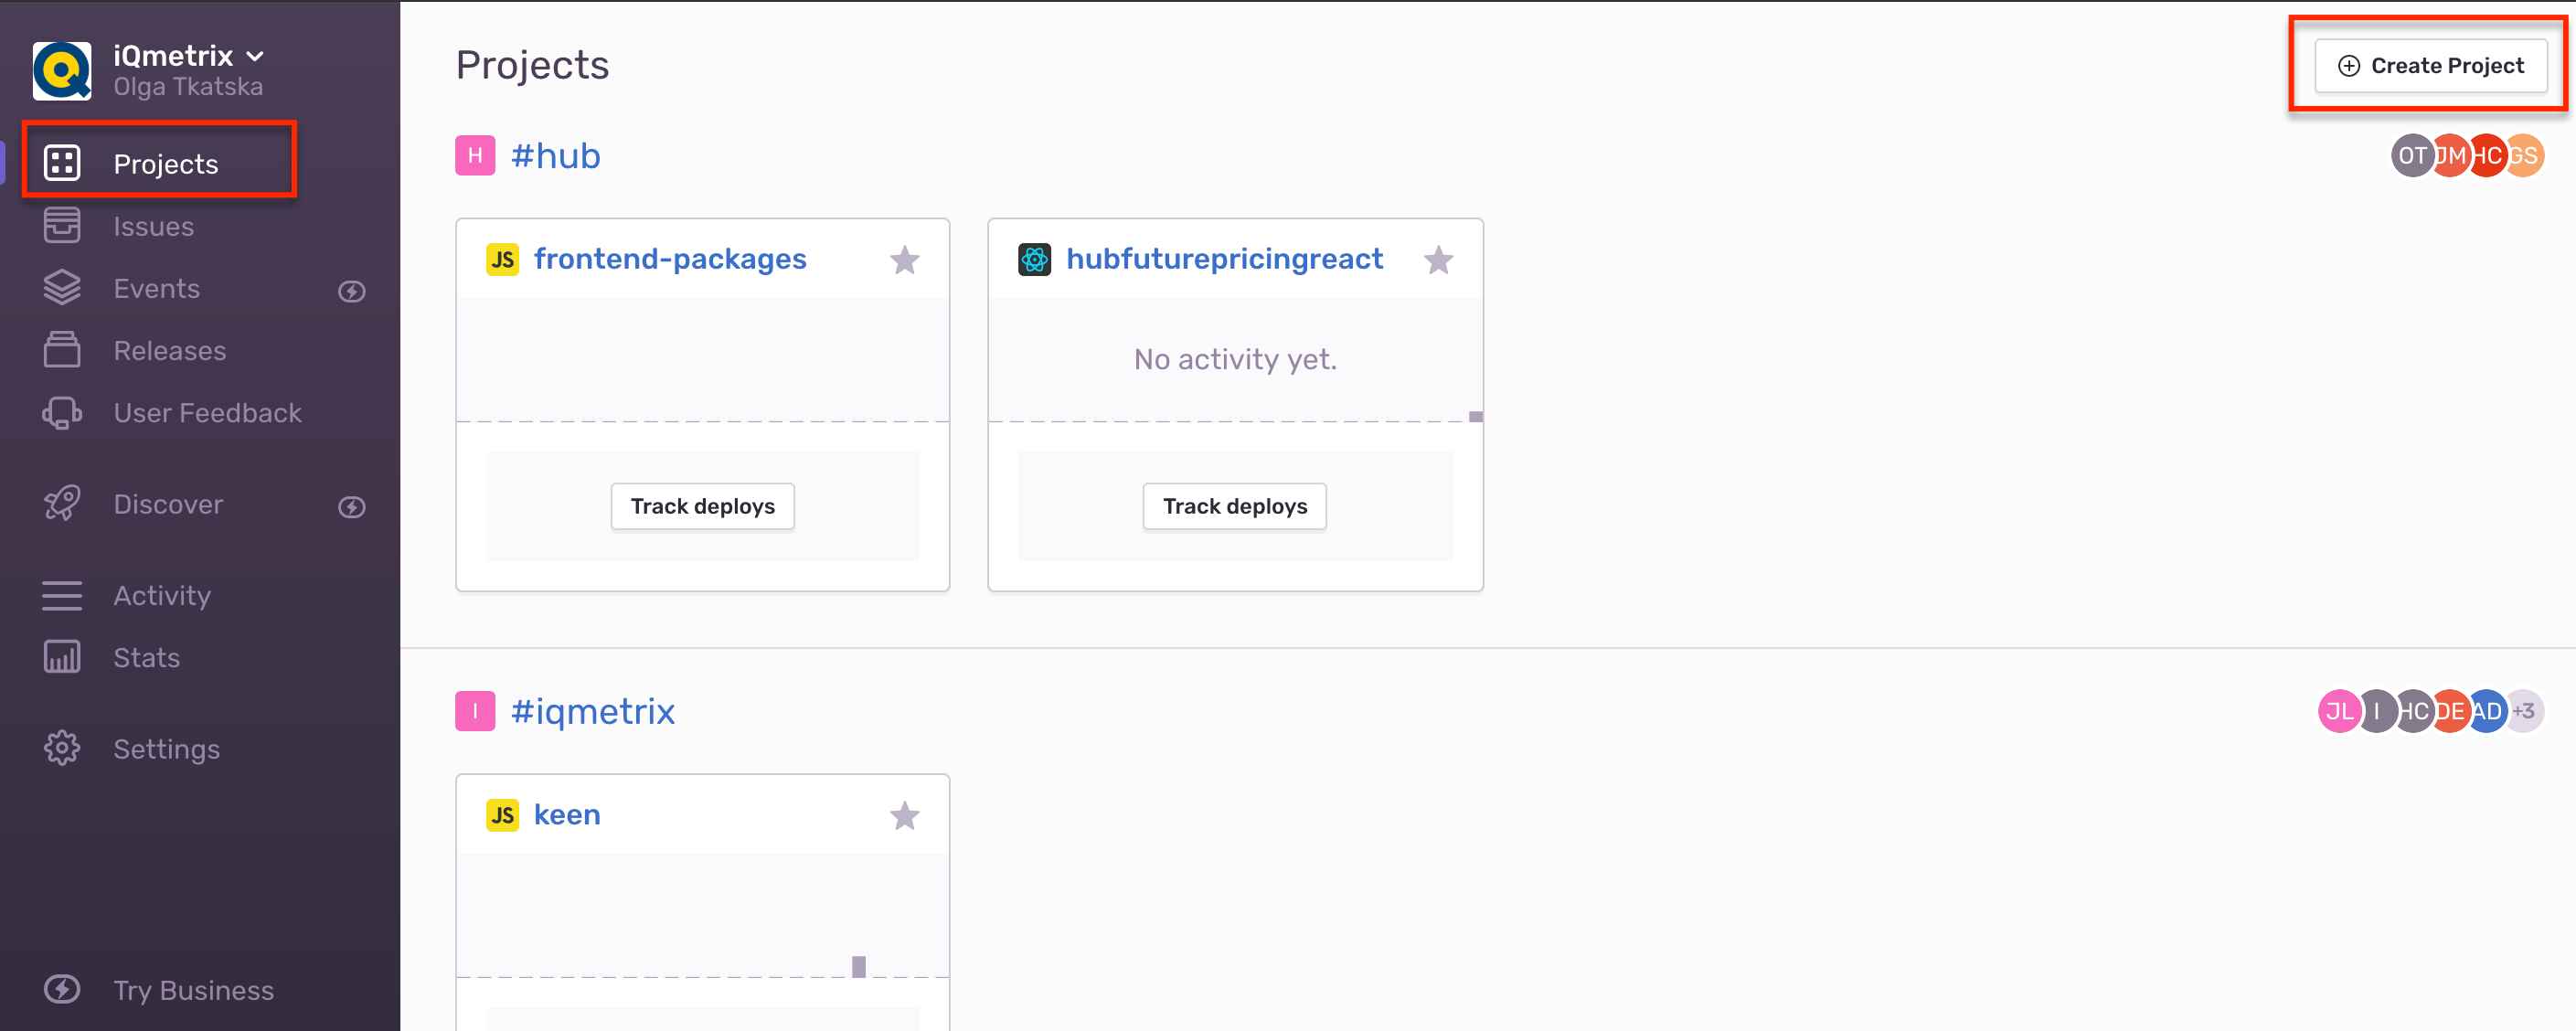
Copy the newly created Project Data Source Name (DSN) for further use, which contains: protocol, public key server address, and project identifier: {dsn: "https://(key)@sentry.io/(project_identifier)'}
Sentry Releases#
Releases in Sentry allow you to track commits, issues, and debug with greater ease (among other great features). This feature is opt-in and will require minimal setup. In order to use this feature, you must:
Initialize Sentry with your release name of
{package.json name}@{package.json version}e.g.hubendlessaisle@2.33.2. See belowAdd the Sentry project name into your
azure-piplines.ymlthat matches with the DSN you initialize Sentry with.
The pipeline will automatically create the Release in Sentry, upload source maps and associate commits to that release. Your application code will associate any logging and error tracking with that release for greater visibility on any issues.
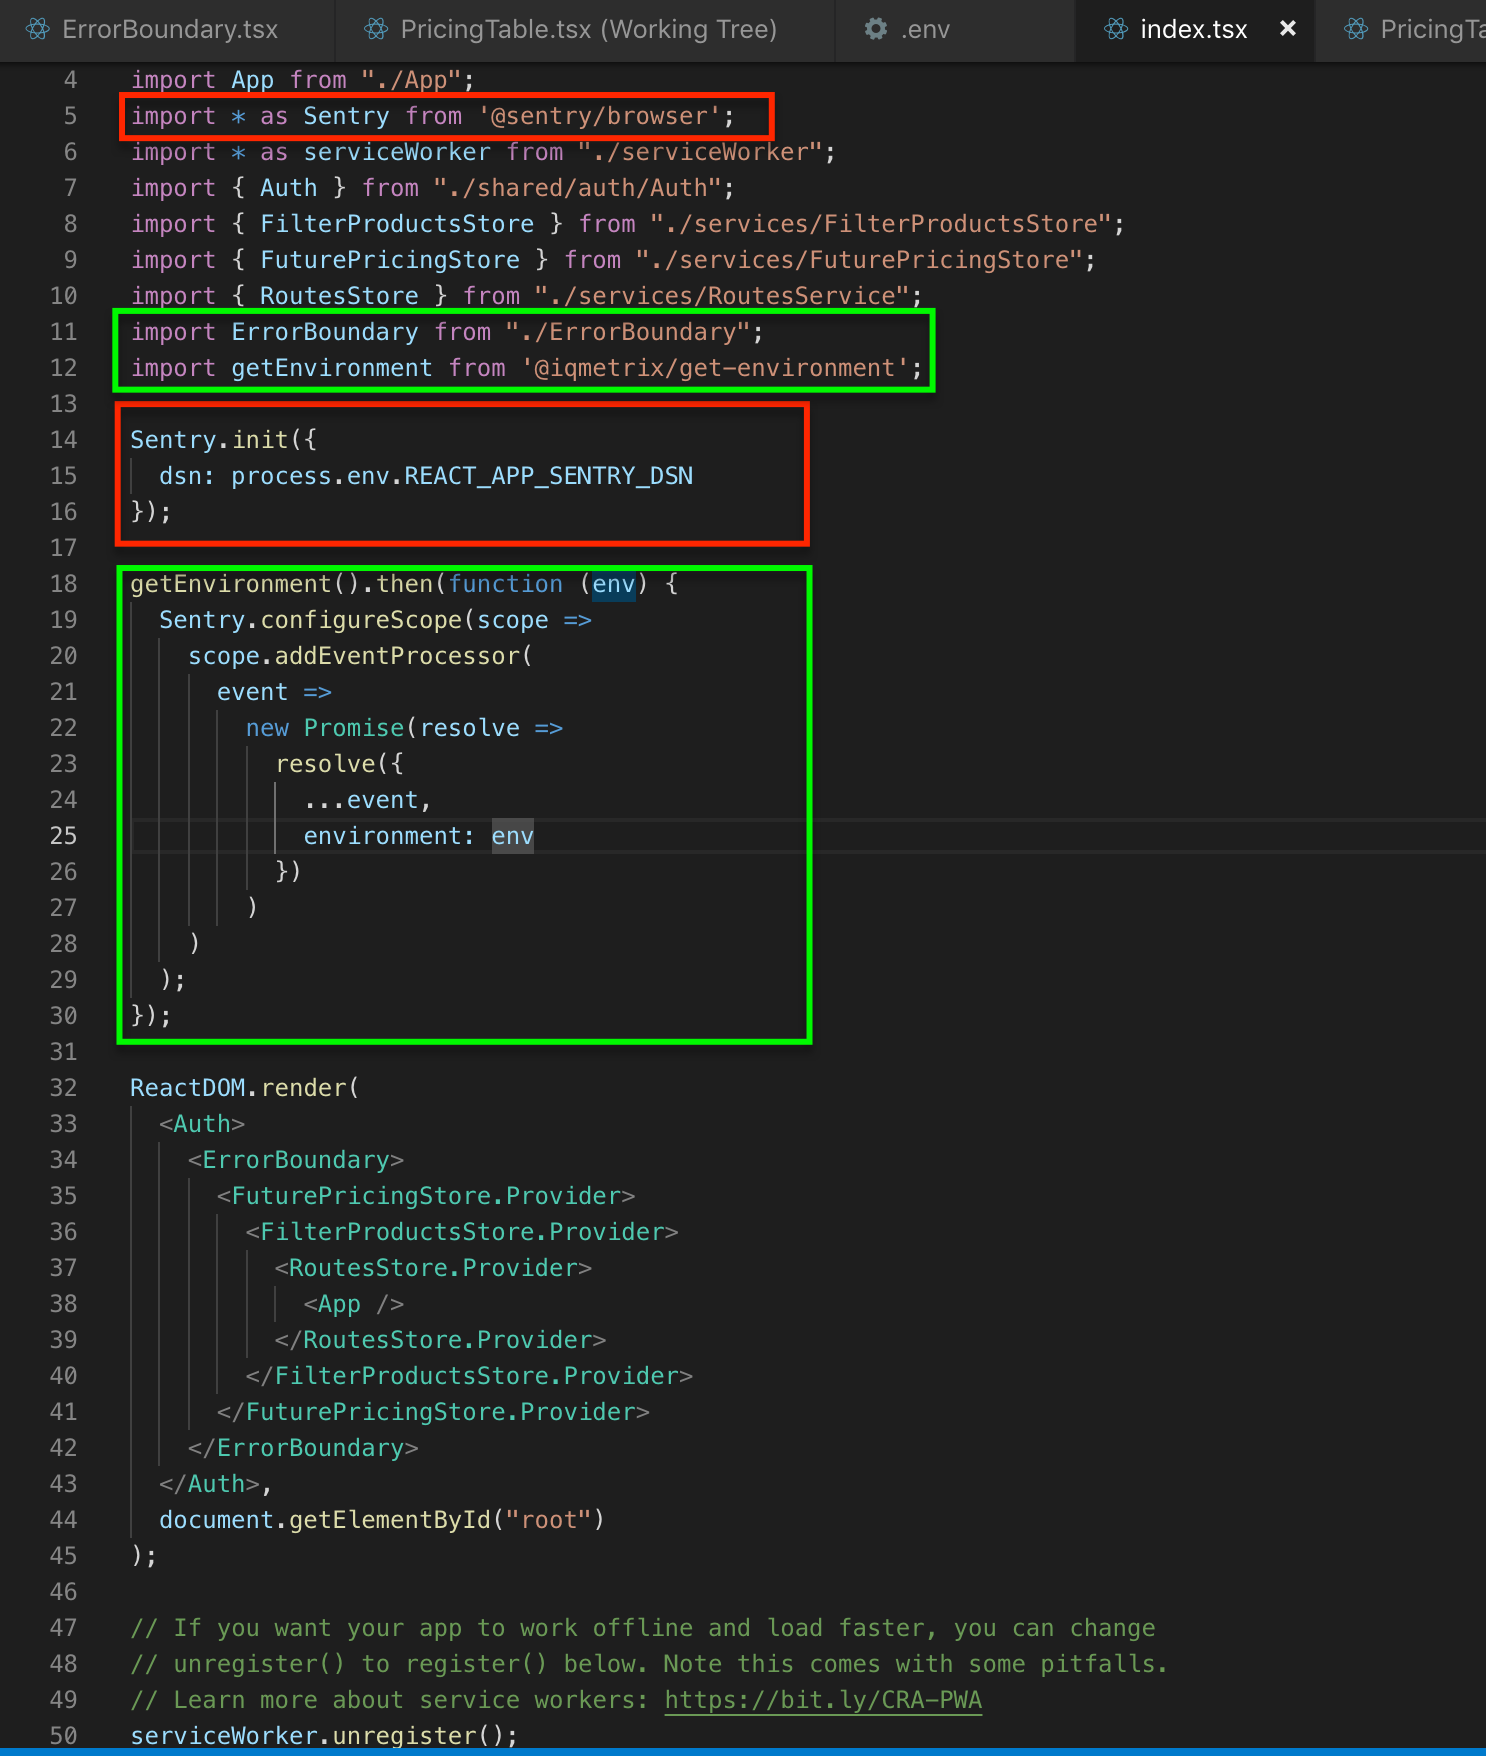
Initializing Sentry in React Hub app#
Init Sentry browser
We use @iqmetrix/get-environment in our front-end code, a function that gets the environment at run-time.

Wrap the
<App />withError Boundariescomponent, withfallbackbeing whatever component you want to show the user when an unexpected error occurs.
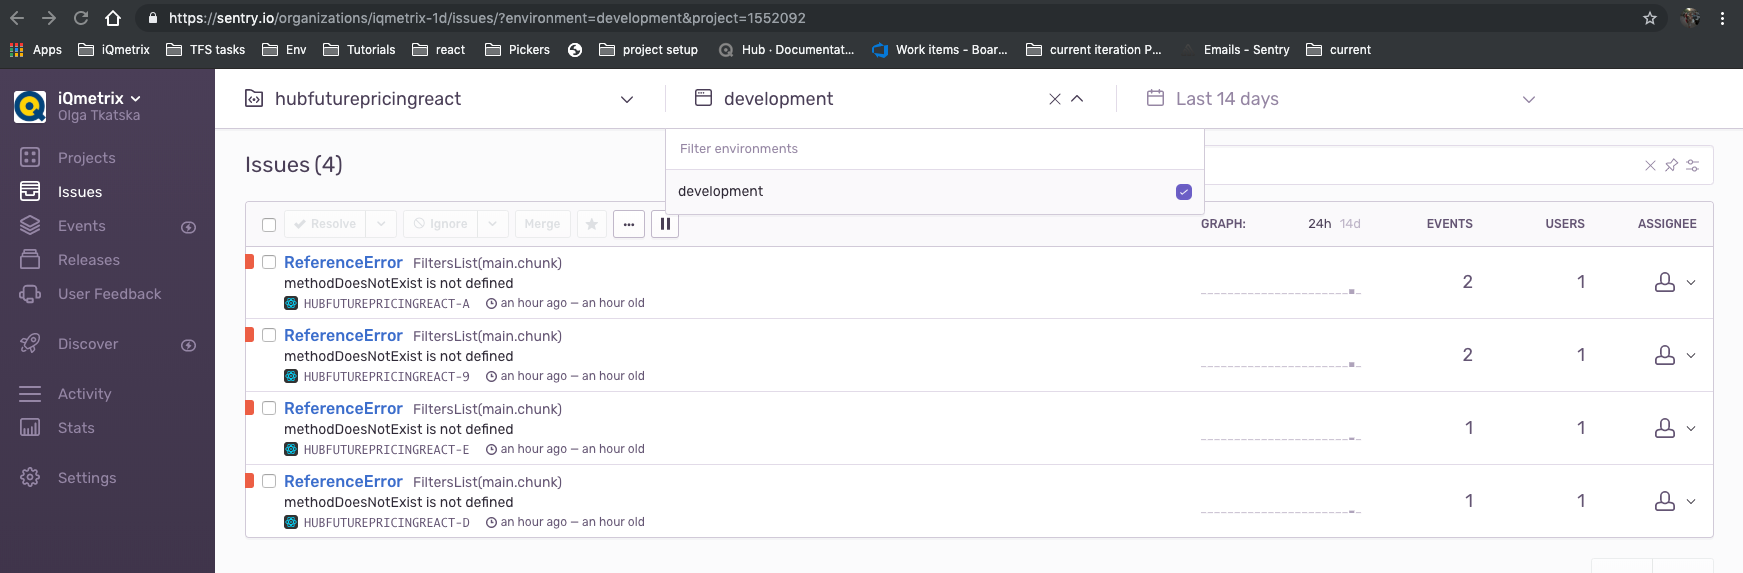
Trigger your first event from your development environment by raising an exception somewhere within your application
Additional information can be found here
Configuration#
SDKs are configurable in many ways.
denyUrls#
By adding denyUrls to the Sentry config we can define urls (a list of strings or regex patterns) that we don't want to track. By default, all errors will be sent. For example we don't necessarily want to track errors happening on localhost.